You can use regular expressions (sometimes stylized as RegEx or regex) to detect and match content when simple keywords or strings will not suffice.
Further Reading
Neither this book nor the MS-102 exam focuses much on the construction of regular expressions. Regular expressions can become quite deep and complex with concepts such as look aheads, look behinds, and grouping. You can learn more about regular expressions using resources such as https://www.regex101.com and https://www.regexpal.com.
To create a sensitive info type using a regular expression, follow these steps:
- Navigate to the Microsoft Purview compliance portal (https://compliance.microsoft. com), expand Data classification, select Classifiers, and then select Sensitive info types.
- Click Create sensitive info type.
- On the Name your sensitive info type page, enter values for Name and Description. Click Next.
- On the Patterns page, select either Create pattern or Create one now.
- On the New pattern flyout, set Confidence level, choosing from either High confidence, Medium confidence, or Low confidence.
- Under Primary element, click Add primary element and select Regular expression.
- Enter an element ID (name).
- In the Regular expression area, enter a pattern for the regular expression, as shown in Figure 10.7:
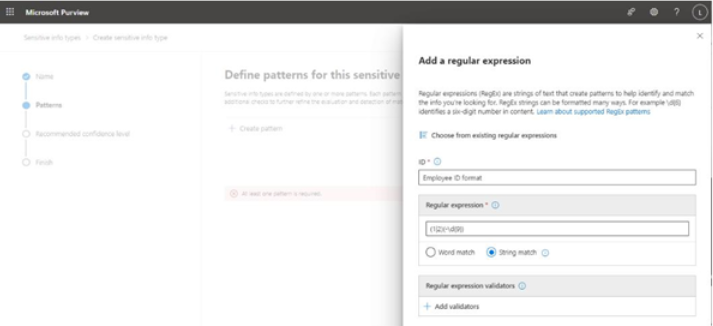
Figure 10.7 – Configuring a regular expression
Note
The default match type is String match (which will take your supplied regular expression). If you switch to Word match, M365 will automatically insert (?:^|[\s,;\:\(\)\ [\]\”‘]) before and (?:$|[\s,\;\:\(\)\[\]\”‘]|\.\s|\.$) after your pattern to ensure it gets matched as a word.
- If desired, you can also select Add validators (validators are functions used to perform complex computations) to support the regular expression and ensure you’re getting quality matches.
- Click Done when finished.
- If secondary or supporting elements will be used, set a Character proximity value that will be used to evaluate whether the primary and supporting elements are close enough to each other to count as a match. Proximity is a mathematical distance calculation. For example, with a character proximity of 40, the employee keyword would match the id supporting element in the phrase The employee entered her company-issued id number in the form. However, with a character proximity of 10, there would be no match.
- If supporting elements will be used to define this sensitive information type, click Add supporting elements or group of elements, and then select the appropriate types of objects. You can add individual elements (such as more keyword lists, keyword dictionaries, regular expressions, or functions) as well as groups that contain multiple element types and configurations.
- Use Additional checks to make any customizations to the rules. Customizations could be things such as including or excluding certain patterns, duplicate characters or items, or particular suffixes.
- Select Create.
- Click Create pattern to add another pattern for this sensitive information type, repeating steps 4 through 14. When finished, click Next.
- On the Recommended confidence level page, select a confidence level and click Next.
- On the Finish page, verify that everything meets your requirements and click Create.
You can now use the sensitive information type throughout the M365 Purview solution. Next, we’ll look at using some of the built-in functions as part of the sensitive information type.