Document fingerprinting is a classification method that’s used to detect data where the content matches a recognizable pattern.
Note
Document fingerprinting is not part of the MS-102 exam guide, though it’s important to be aware of the technology from a functional perspective. For more information on the document fingerprinting capabilities in Microsoft Purview, see https://learn.microsoft.com/ en us/purview/document-fingerprinting.
This custom sensitive information type is most useful for data stored in forms that your organization uses. Some examples are tax forms, patent forms, health insurance forms, or workplace injury reporting forms.
In this example, you’ll use a standard tax reporting form (Internal Revenue Service W2) as the basis for a document fingerprint:
- Navigate to the Microsoft Purview compliance portal (https://compliance.microsoft. com), expand Data classification, select Classifiers, and then select Sensitive info types.
- Click Create Fingerprint based SIT.
- On the Name page, enter values for Name and Description. Click Next.
- On the Upload file page, as shown in Figure 10.10, click Upload file and browse to the location where your source form or document is stored.
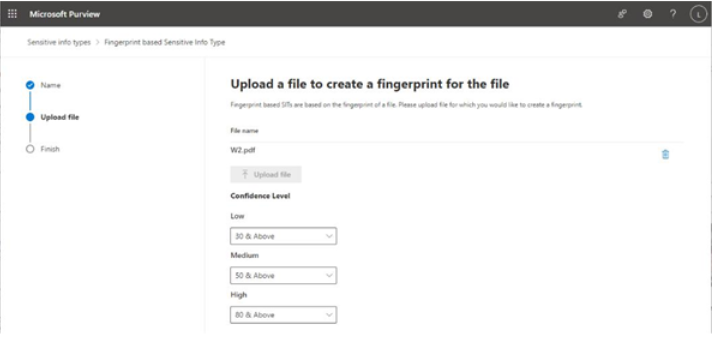
Figure 10.10 – Uploading a form for a document fingerprint
- Adjust the Confidence Level setting. The numbers associated with each confidence level correspond to the percentage of text that must be detected in order to be returned as a match. Low confidence matches will contain the fewest false negatives but also the most false positives. High confidence matches will contain the fewest false positives, but will have the most false negatives (items that were missed). Click Next when finished.
- On the Finish page, click Create.
The document fingerprinting sensitive information type can now be used across Exchange, SharePoint, OneDrive, and Teams locations.
Additional Information
You can find the source template form for this at https://www.irs.gov/pub/irs-pdf/fw2.pdf.
Using Exact Data Match
Exact Data Match (EDM) is another pattern matching feature that is part of M365 Purview solutions, only instead of matching generic keywords or patterns, Microsoft Purview looks for specific custom data. EDM is a great solution for detecting things such as patient data, client information, and structured organizational intellectual property.
Note
EDM is not part of the MS-102 exam guide, though it’s important to be aware of the technology from a functional perspective.
It takes quite a bit of effort to set up and relies on several components:
• Providing the actual sensitive data that you are trying to protect. Since EDM is being used to detect very specific information, you need to supply the actual information that you’re trying to protect, for example, a spreadsheet of patient names and identification numbers.
• Creating an EDM classifier. The EDM classifier is based on a schema (or definition) of how your data is represented.
• A credential that will be used to upload content.
• A dedicated physical or virtual computer that will run the EDM Upload Agent.
In order to ensure that M365 has the most current data, you should develop a process to export the data you want to protect on a regular basis (for example, exporting the table that lists patient names and sensitive information once a day or once a week to the computer running the EDM Upload Agent). After creating the EDM classifier and setting up valid data export credentials, you configure the EDM Upload Agent to upload the data to M365.
Further Reading
For more information on Exact Data Match, see https://learn.microsoft.com/en-us/purview/sit-get-started-exact-data-match-based-sits-overview.