Retention labels are essentially content metadata (like virtual sticky notes) that allows users (or, if using automatic label policies, the M365 platform) to manage the retention of content by exception. The label follows the content wherever it goes.
For example, you may have a retention policy that retains all content for 3 years and then forcibly deletes it. However, the organization’s legal department has also stipulated that all documents relating to signed contracts must be retained for 30 years. Since the contract content might be stored in places where content will be deleted after 3 years, it’s important to have a mechanism to protect this organizational information.
That’s where a retention label fits—allowing you to apply metadata to the object that will ultimately govern its retention lifecycle.
Let’s look at creating a sample retention label:
- Navigate to the Microsoft Purview compliance portal (https://compliance.microsoft. com), expand Data lifecycle management, and select Microsoft 365.
- Select the Labels tab.
- Select Create a label, as shown in Figure 10.20:
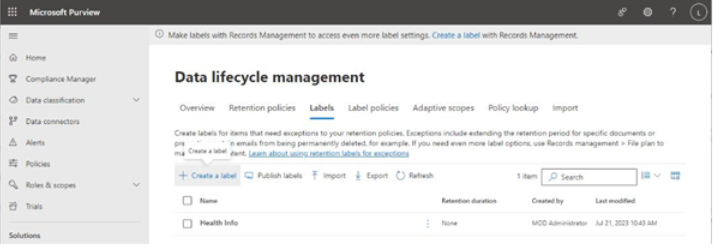
Figure 10.20 – Using the Labels tab
- On the Name page, enter a Name value for the label. You can also enter separate Description for users and Description for admins values. Click Next.
- On the Label Settings page, select which type of label settings you want to associate with this label. You can choose Retain items forever or for a specific period, Enforce actions after a specific period (depending on your licensing level, this can include relabeling items at the end of the period, triggering a disposition review, or running a Power Automate flow), or Just label items. If you are going to choose Just label items, it would likely be better to choose a sensitivity label instead. See Figure 10.21:
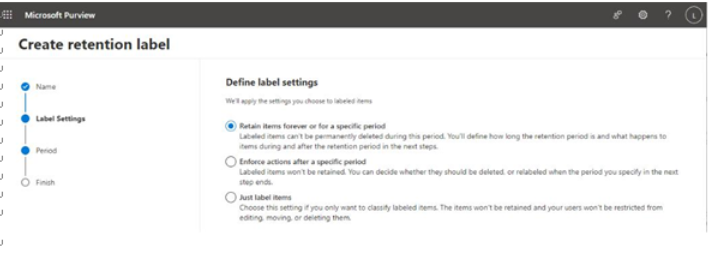
Figure 10.21 – Selecting label settings
- If you selected either Retain items forever or for a specific period or Enforce actions after a specific period, you can then define a time period for which this label will protect the data. See Figure 10.22:
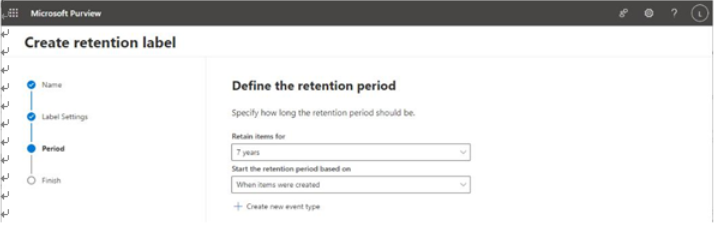
Figure 10.22 – Defining a retention period
Further Reading
If you select the Retain items forever or for a specified period option, you also have the option to define events for event-driven or event-based retention policies. Event-driven policies allow you to implement workflows that start the labeling process on a defined business event, such as an employee termination, contract renewal, or other product lifecycle. Event-driven policies require a significant amount of business and records-management planning and effort to configure (such as the assignment of asset IDs to documents). To learn more about the configuration of event-driven labels, see https://learn.microsoft.com/en-us/ purview/event-driven-retention.
- Click Next.
- On the Setting after period page, choose which type of action to take after the retention period expires. You can choose Delete items automatically, Deactivate retention settings, or Change the label if you have either M365 E3 or E5 subscriptions. However, if you have the M365 E5 subscription (or either the EMS E5 or Advanced Compliance subscription), you also have the Run a Power Automate flow and Start a disposition review options. See Figure 10.23.

Figure 10.23 – Choosing what happens when the retention period expires
Further Reading
For M365 E5, EMS E5, and Advanced Compliance subscriptions, the additional events that you can take are quite powerful. When you choose to schedule a disposition review, you can create workflows (called stages) and assign reviewers to the stages. The idea is for those reviewers to look at the content and decide on an outcome—whether that’s to remove the label, delete the content, or assign a new label. You can have up to five review stages, each with its own reviewers. To learn more about the disposition review process, see https://learn.microsoft. com/en-us/purview/disposition.
Running a Power Automate flow is a newer option that increases the flexibility of retention even more. By utilizing the When an item reaches the end of its retention period trigger in Power Automate, you have the full use of every action available in Power Automate. You could potentially use this feature in the place of event-driven retention as well. For more information on integrating Power Automate with your retention process, see https://learn.microsoft. com/en-us/purview/retention-label-flow.
- Click Next.
- On the Finish page, review the configuration and make any adjustments. Click Create label to complete the setup.
While the label has been created, it’s not yet available for use. Clicking Create label now starts the next step in the process—publishing labels. You’ll look at the publishing process next.
After creating a label, you’re immediately presented with a prompt to do something with the label.
The possible choices are shown in Figure 10.24:
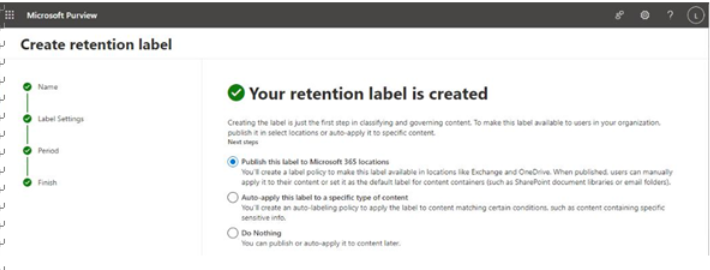
Figure 10.24 – Publishing options
The options allow you to configure label policies:
• Publish this label to Microsoft 365 locations: This makes the label available for users to apply in locations such as Exchange mailboxes, as well as OneDrive for Business and SharePoint Online sites.
• Auto-apply this label to a specific type of content: This type of policy is used to apply the label to content that matches specific criteria, such as built-in or custom sensitive information types.
• Do Nothing: The label is not visible to users.
In this example, let’s select Publish this label to Microsoft 365 locationsto start the wizard to configure a publishing policy. You’ll look at that wizard in the next section.