After you’ve created a label, it’s only visible to administrators of the Microsoft Purview solution—it can’t be assigned by users. From here, there are two ways to deploy a label: publishing the label so that users can manually apply it to content or auto-applying the label based on the given content.
Publishing a label
In this section, you’ll pick up where we left off after creating the label and publish it for manual application:
- On the Choose labels to publish page, the label that you created in the previous section is automatically selected, though you can click Edit to add additional labels. This is the same wizard that starts when you select Publish on the Labels page as well. Click Next.
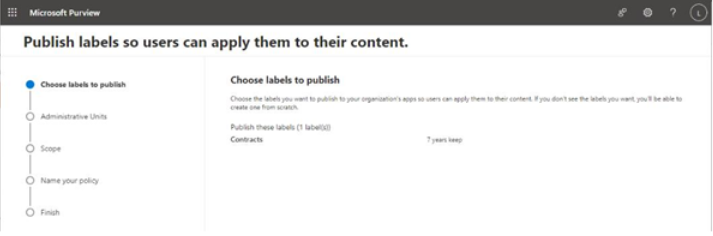
Figure 10.25 – Choosing a label to publish
- On the Administrative Units page, you can select which administrative units will receive this label policy. By default, it is scoped to the entire directory. Click Next.
- On the Scope page, select which type of policy to create—either Adaptive or Static. Adaptive-scoped policies cause the label to be available only on certain sites or to certain users whose properties match the connected adaptive scopes. Static-scoped policies apply to all entities in the selected workload.
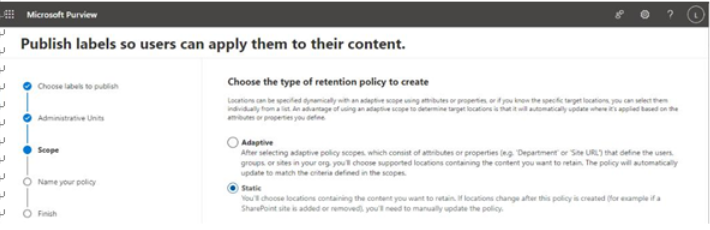
Figure 10.26 – Selecting a scope for the policy
• If you select Adaptive and click Next, you’ll be presented with the Adaptive scope page where you can select the adaptive scopes that you want to use with the policy and specify which locations support this adaptive scope.
• If you select Static and click Next, you’ll be presented with the Publish to users and groups page, where you can select the locations where the label will be published.
- Click Next.
- On the Name your policy page, enter Name and Description values for the label policy. Click Next.
After the publishing policy has been created, the labels will be available for users to apply.
Note
Labels are only published to Exchange Online mailboxes if the mailboxes have more than 10 MB of content.
Next, you’ll shift to auto-applying labels.