The Event timeline page displays vulnerabilities in the order they were discovered or affected your environment. See Figure 9.38 for an example timeline:
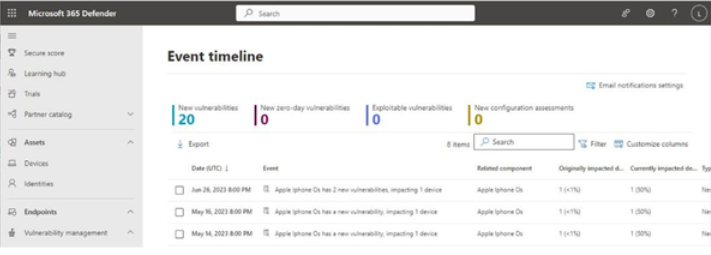
Figure 9.38 – Event timeline page
Selecting an item on the timeline will display the corresponding CVE information as well as links to any security recommendations. Clicking on the associated security recommendation will take you to the Recommendations page, where you can implement the steps suggested.
Baseline Assessment
A new feature of Vulnerability Management, Baseline assessment relies on security profiles to continuously evaluate your endpoints against benchmarks. Security profiles mapping to CIS benchmarks are available for Windows 10 and later client endpoints and Windows 2008 R2 and later server endpoints. Security profiles mapping to STIG benchmarks are available for Windows 10 and Windows Server 2019.
Baseline assessment is available as either part of the Microsoft Defender Vulnerability Management Standalone plan or the Defender Vulnerability Management add-on for MDE P2. Assessments are deployed via Group Policy Object (GPO) configurations.
Creating a Security Profile
To create a profile, follow these steps:
- Navigate to the Microsoft 365 Defender portal (https://security.microsoft.com). Expand Vulnerability management and select Baselines assessment.
- Select the Profiles tab, and then select Create profile.
- On the Name profile page, enter a name and a description. The Activate profile button is selected by default.
- On the Baseline profile scope page, under Software, select the version of Windows to which this profile will apply.
- In the Benchmark section, select which base benchmark to use.
- Under Compliance level, select which compliance level you want this profile to measure against. See Figure 9.39:
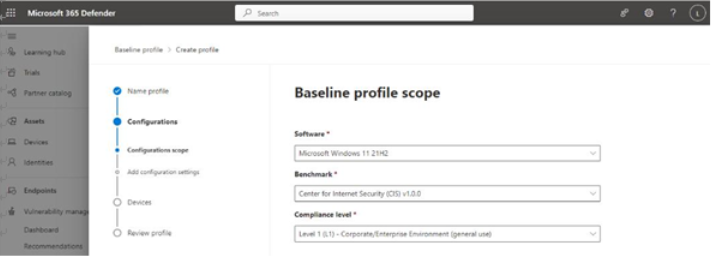
Figure 9.39 – Configuring Baseline profile scope
Note
Depending on the benchmark selected, you will see different compliance level options. While specific information about compliance levels isn’t required for the MS-102 exam, you should know that they exist. You can learn more about CIS benchmark compliance levels here: https://www.cisecurity.org/cis-benchmarks. You can learn more about the STIG compliance levels here: https://www.titania.com/resources/guides/ disa-stig-compliance-explained/.
- Click Next.
- On the Add configuration settings page, select which items from the benchmark and compliance scope you want to validate against and click Next. Some configuration settings, as shown in Figure 9.40, present a Customize option. Since many of the configurations check local device policies or registry settings, you can customize the values that the baseline checks against.
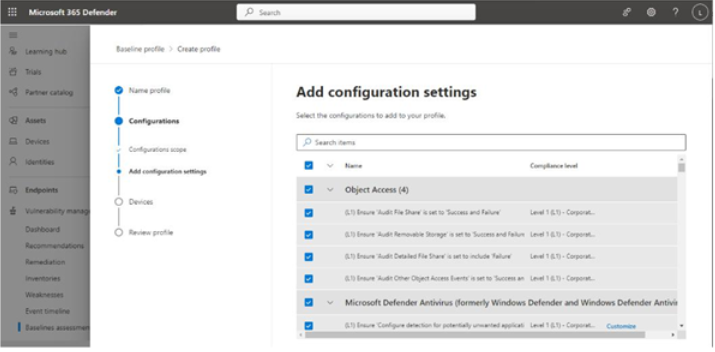
Figure 9.40 – Profile configuration settings
- On the Devices to assess page, select which devices will be in scope for the baseline profile. You can select All device groups, Selected device groups, and Filter by device tags. The page will show you how many devices are in scope based on your selection criteria.
- On the Review profile page, click Submit to create the profile.
After the profile has been created, you’ll be returned to the Profiles tab of Baselines assessment.