In this sequence, you’ll configure Defender for Endpoint to use compliance and app protection policies configured in Intune.
To complete the configuration, follow these steps:
- Navigate to the Intune admin center (https://endpoint.microsoft.com or https://intune.microsoft.com).
- Select Endpoint security from the navigation menu pane.
- In the middle pane, scroll down to the Setup section and select Microsoft Defender for Endpoint.
- In the details pane, scroll to the Compliance policy evaluation section, as shown in Figure 9.8:
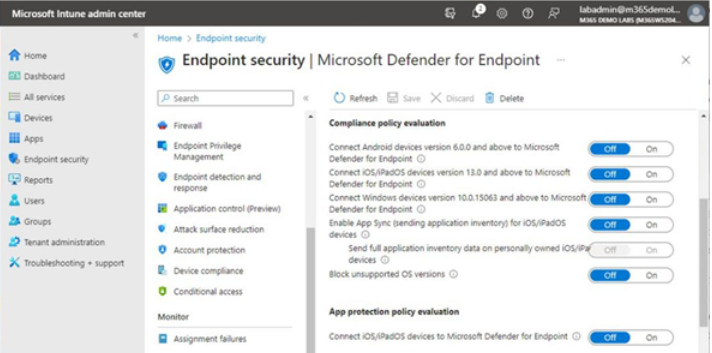
Figure 9.8 – Compliance policy evaluation section
- Enable the policy toggles that apply to your organization, such as Connect Android devices version 6.0.0 and above to Microsoft Defender for Endpoint, Connect iOS/iPadOS devices version 13.0 and above to Microsoft Defender for Endpoint, and Connect Windows devices version 10.0.15063 and above to Microsoft Defenderfor Endpoint.
When enabling these settings, Intune will use the device threat level information sent by MDE to determine whether the device is compliant or not.
- Click Save when you’ve finished.
This will enable both current and future Intune-enrolled devices to integrate with MDE.
Enabling App Protection Policy Evaluation
In addition to using Defender for Endpoint for compliance policy evaluation, you can also integrate app protection policies.
To enable the app protection policy integration, follow these steps:
- Navigate to the Intune admin center (https://endpoint.microsoft.com or https://intune.microsoft.com).
- Select Endpoint security from the navigation menu pane.
- In the middle pane, scroll down to the Setup section and select Microsoft Defender for Endpoint.
- In the details pane, scroll to the App protection policy evaluation section.
- Enable the policy toggles that apply to your organization, such as Connect Android devices to
Microsoft Defender for Endpointand Connect iOS/iPadOS devices to Microsoft Defender for Endpoint. Depending on your tenant, you may not have both of these settings available.
- Click Save when you’ve finished.
You’ve now configured the integration between Intune and Defender!
Configuring a Compliance Policy
If you want to use the device health and risk level as part of Conditional Access, you should configure a compliance policy. To configure a compliance policy, follow these steps:
- Navigate to the Intune admin center (https://endpoint.microsoft.com or https://intune.microsoft.com).
- From the navigation menu pane, click Devices and then select Compliance policy. See Figure 9.9:
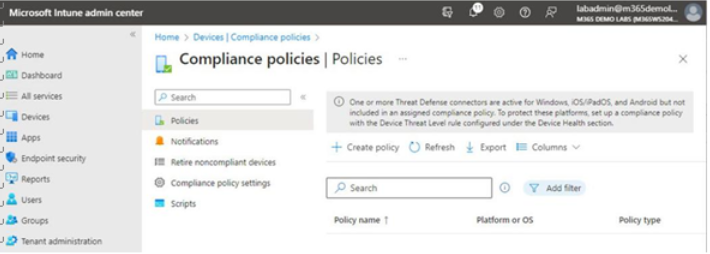
Figure 9.9 – Device Compliance policy page
- In the details pane, click Create policy.
- Select a platform such as Android Enterprise, iOS/iPadOS, or Windows 10 and later. See Figure 9.10:
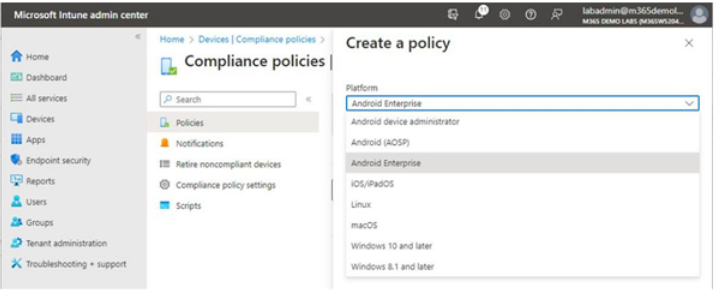
Figure 9.10 – Creating a device compliance policy
- Select a profile. Depending on the platform you select you will have different options available. Click Create. The policy wizard will start.
Further Reading
There are a vast number of platform and profile options available, so you’ll need to review which ones will be best for your organization. For more information on the device profile options, see https://learn.microsoft.com/en-us/mem/intune/configuration/ device-profiles.
- On the Basics tab, enter information such as a name and description. Note that the Platform and Profile type options are grayed out. Click Next.
- On the Compliance settings tab, select the options that work best for your organization. For example, if configuring an Android policy, you may choose to flag devices that have been rooted (devices that have had the vendor-supplied boot image parameters bypassed to allow non-standard apps or configurations) or devices older than a certain version as non-compliant.
Device Health and Risk
There are two options on the Compliance settings tab that may appear confusing: Microsoft Defender for Endpoint | Require the device to be at or under the machine risk score and Device health | Require the device to be at or under the Device Threat Level. The first option, Require the device to be at or under the machine risk score, uses the MDE data to compute a risk score across the application, operating system, network, accounts, and security controls categories.
The combined results from those categories result in a machine risk score. Devices exceeding the selected level are marked as non-compliant. The second option, Require the device to be at or under the Device Threat Level, evaluates current threats on the device using the information provided by a connected mobile threat management defense (such as Defender for Endpoint, Lookout for Work, Better Mobile, or Zimperium).
When you’ve finished, select Next. See Figure 9.11:
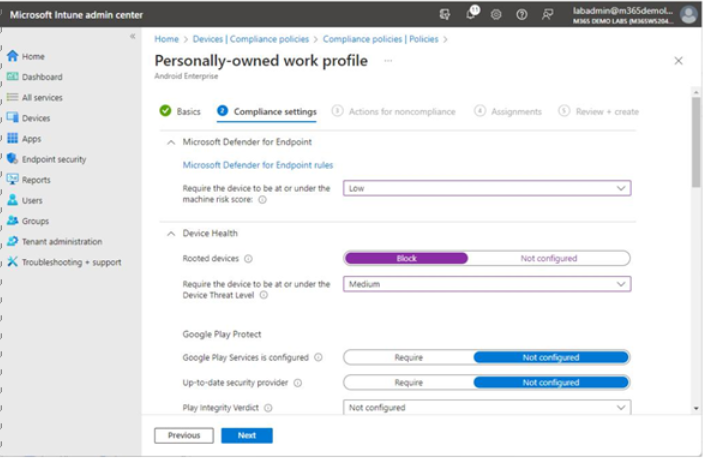
Figure 9.11 – Configuring Compliance settings
- On the Actions for noncompliance tab, select any additional actions such as Send email to end user, Send push notification to end user, Remotely lock the noncompliant device, or Add device to retire list. You can configure multiple instances of each action type, if desired. Fill out the additional fields as necessary and click Next when finished. See Figure 9.12:
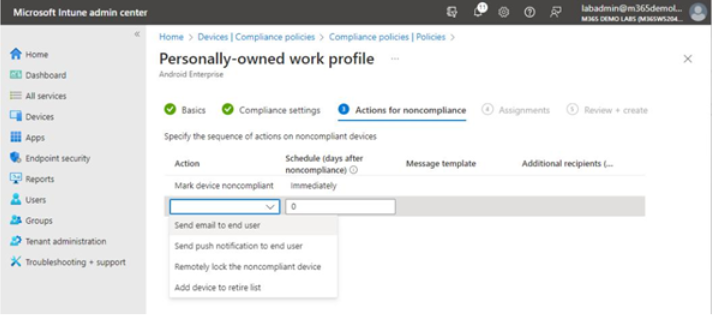
Figure 9.12 – Configuring Actions for noncompliance
- On the Assignments tab, select which users or devices to apply this policy to and click Next.
- On the Review + create tab, confirm the settings and click Create to save the policy.
Now that you have a compliance policy configured, you can use device compliance as part of a Conditional Access policy.