- For each option you selected in step 7, the corresponding protection settings need to be configured as follows:
I. If you selected Apply or remove encryption, you can choose from Remove encryption if the file or calendar event is encrypted or Configure encryption settings. Removing encryption ends the encryption portion of the wizard, but the latter configure option presents additional options:
i. Assign permissions now or let users decide has two options for permissions management:
a. If you select Assign permissions now from the dropdown, you are presented with options for content expiration (User access to content expires). This option lets you control whether you want users to be able to continue to access content regardless of the date (Never), or whether you want to impose time limits on access (On a specific date or A number of days after label is applied). Assigning permissions now also allows you to choose Allow offline access (Always, Never, or Only for a number of days), controlling how frequently credentials can be used to access content. Under Assign permissions to specific users and groups, you have the ability to select which users and groups will be allowed to interact with the content and what permissions or rights are granted (allowing you to choose from built-in options such as Co-Owner, Co-Author, Reviewer, or Viewer) as well as a Custom option where you can configure the exact permissions (View content, View rights, Edit content, Save, Print, Copy and extract content, Reply, Reply all, Forward, Edit rights, Export content, Allow macros, and Full control). See Figure 10.37:

Figure 10.37 – Choosing encryption settings
b. If you choose Let users assign permissions when they apply the label, you have a somewhat smaller set of options to configure. You can choose to limit the Outlook actions to Do Not Forward or Encrypt Only as well as the In Word, PowerPoint, and Excel, prompt users to specify permissions option (generating a dialog for choosing users, groups, and permissions).
iii. Finally, you can choose Use Double-Key Encryption (requires additional configuration of the double-key encryption service) for content that requires additional protection.
II. If you selected Apply content marking you have another set of options. Content marking allows you to place security features such as watermarks in document headers and footers, email messages, and meeting invitations sent via email.
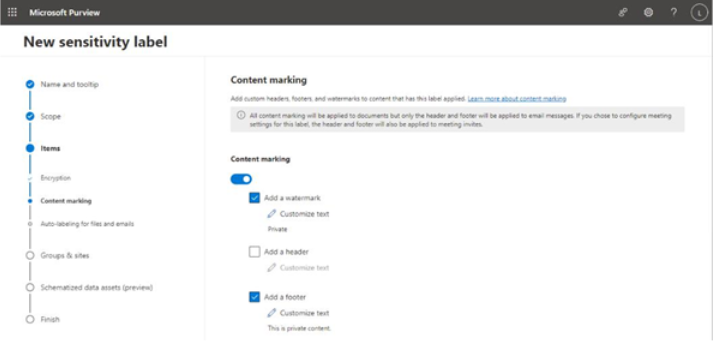
Figure 10.38 – Applying content marking settings
III. Click Next to proceed to the next set of pages.
- If you have selected to apply either content marking or encryption, you are given a final option to enable auto-labeling. See Figure 10.39.
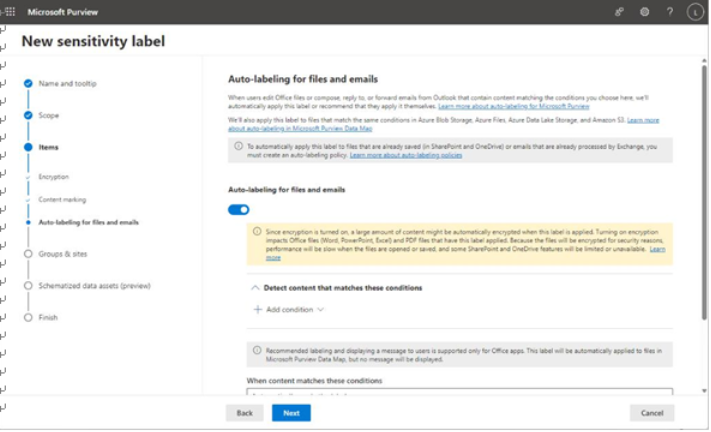
Figure 10.39 – Enabling auto-labeling
Auto-labeling leverages familiar technologies including sensitive information types and conditions to control how content is labeled or marked when it is created. If, however, you want M365 to process content that already exists, you’ll need to create a separate policy (which we’ll get to in the next section).
- Click Next.
- If you selected Groups & sites as part of the scope at the beginning of the New sensitivity label wizard, you’ll be able to configure options that manage access and rights—such as privacy controls, sharing, and Conditional Access—that govern the group or site containers where this label is applied. See Figure 10.40.
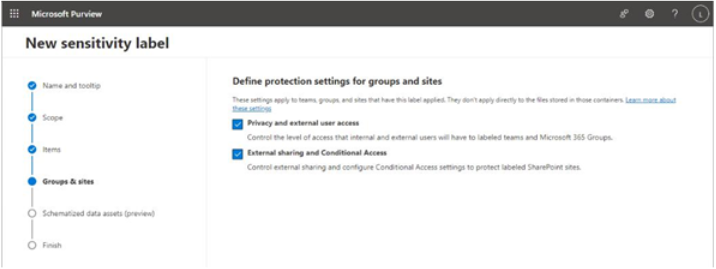
Figure 10.40 – Defining protections for groups and sites
- Select which protection settings you want to configure and click Next.
- On the Privacy & external user access settings page, select the options that you wish to apply to external sharing and privacy for groups, such as configuring the team or group as Private
and enabling Let Microsoft 36 Group owners add people outside your organization to the group as guests. Click Next.
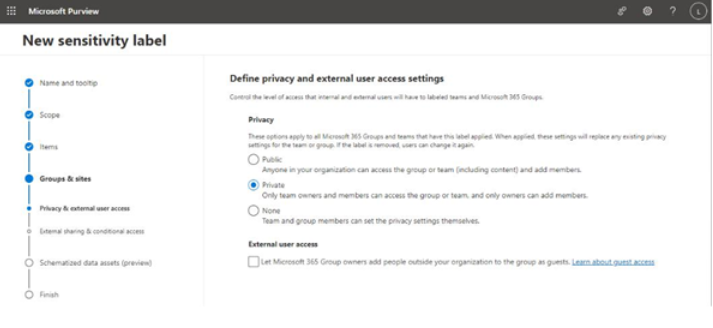
Figure 10.41 – Configuring privacy and external access settings
- On the External sharing & conditional access page, select the options that you want to apply to this group or site. The Control external sharing from labeled SharePoint sites option mirrors the SharePoint and OneDrive access slider configured in the SharePoint admin center and, if selected, allows you to choose the scope of users that can be invited to the site. Selecting the Use Azure AD Conditional Access to protect labeled SharePoint option allows you to configure access protections through either managed device settings or authentication contexts. See Figure 10.42.
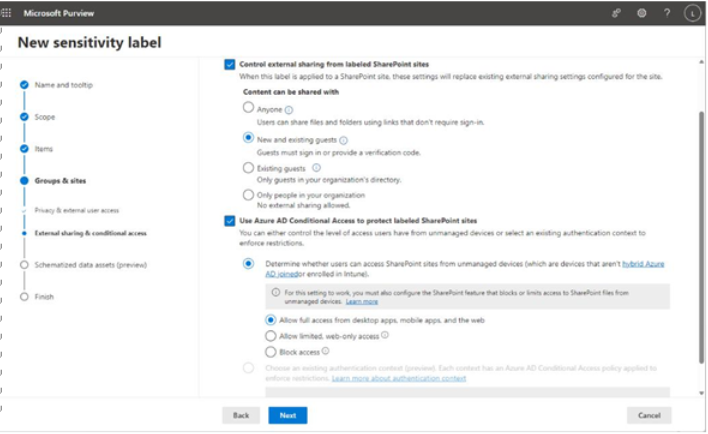
Figure 10.42 – Configuring external sharing and Conditional Access controls
Using an authentication context control
If the authentication context radio control isn’t available, it’s because you haven’t created an authentication context that can be used. An authentication context is essentially a tag that is applied to securable resources that can be used in conjunction with a Conditional Access policy to configure more granular restrictions. For more information on authentication contexts, see https://learn.microsoft.com/en-us/entra/identity/conditional-access/concept-conditional-access-cloud-apps#authentication-context-preview.
- Click Next.
- If you selected Schematized data assets on the Scope page of the wizard, you can choose to apply sensitive information types to content stored in SQL, Azure SQL, Azure Synapse, Azure Cosmos, or AWS RDS (as well as other data sources as they are added to the Microsoft Purview Data Map).
- Click Next.
- On the Finish page, review the settings and then click Create label.
- After creating the label, you can choose Publish the label to users’ apps to start the label policy publishing wizard or Don’t create a policy yet. Choosing Publish the label to users’ apps starts a new wizard to apply labels. In this example, you can choose Don’t create a policy yet, since you will be creating label policies later.
- Click Done when finished.
Next, you’ll look at sublabels.